Adding, Deleting and Customizing Web Parts for an Office 365 Communication Site – The News, Events, Document and Image Gallery Web Parts


In our previous installments, we have been building on the basics of a Communication Site to understanding how a Communication Site is created and shared. In this installment, we continue with adding, deleting and customizing the last four types of web parts.

Types of Web Parts

There are five different types of web parts, each with a specific function.  These web parts include:  News, Events, Document, Image Gallery and Hero, which was explained in Part 4. 

1.  News Web Part

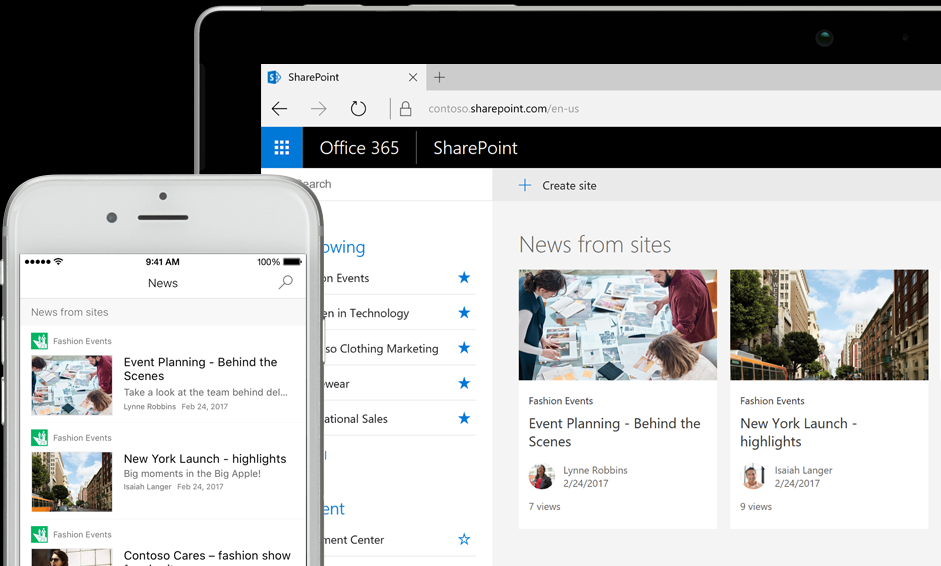
The News web part that can be added to your Communication Site design. With News, you can engage your audience with interesting stories, important announcements, status updates and more with the use of high impact graphics and rich formatting.

Adding the News web part is very simple:

  1. Click Edit – found at the top right of the page;
  2. Above the News web part, hover your mouse until a line with a circle appears:

Plus sign for adding web parts to a page

  1. Click the + sign in the green circle;
  2. Select News web part. 

Now that your News web part has been added, you can now customize the layout for it. There are three possible layouts:

  1. Top Story:  On the left is a large image space, on the right is space for three additional stories;
  2. Side-by-Side: A two-column list of stories and is the default layout for the Communication Site; and
  3. List:  News posts are shown in a single column. 

To change the layout:

  1. Click Edit – found at the top right of the page;
  2. Click Edit button – found on left side of the News web part; and
  3. In the Toolbox, select the layout you want to use. 

Now that you have added and chosen the layout for your News web part, the next step is to populate it with content by creating news posts.

To create News posts on your published or saved page:

  1. In the empty News box, click +Add to start creating your post.;
  2. Add your headline;
  3. Click +Add to add text and graphics on your page;
  4. Click Publish, found at the top right, when you are done creating your page.  Your story will now appear in the News section as the most recent story. 

Sometimes, we create a new post but then for different reasons, need to delete it.  Deleting a news post is as follows:

  1. Click See All;
  2. Click Manage Posts;
  3. Find the page that you would like to remove;
  4. To the right of the page that you would like to remove, click on the three ellipses (…); and
  5. Click Delete

A unique and useful feature with the News web part is the ability to share your new post via email.  The email will include the link to the news post, a thumbnail preview, a description, and the option to provide a message to one or more recipients.

To send your page via email:

  1. Click Send by Email – found at the top of your page;
  2. In the To box, enter the name of the recipients;
  3. Type a message to your recipients if you want to; and
  4. Click Send

3.  Events Web Part

The Events web part is a great way to actively engage your audience.  As it states, it announces events that pertain to the various projects, launches, and celebrations across the organization. It is a great way to share the successes of all the teams in the organization and helps to team build and boosts morale. 

You can add an Events web part to your Communication Site design by:

  1. Click Edit – found at the top right of the page;
  2. Hover your mouse below or above an existing web part, or under the title region. Click on the + sign in the green circle.  Select the Events web part;
  3. In the Title box, add your own title;
  4. Click Edit Web Part – found on the left to set options.  There are three sections that can be completed:


    1. Events List:  an empty Events list automatically created with the default settings of a Calendar list.  If there is more than one event list on the site, you can select the one that you want;
    2. Category:  if your list has categories, you can filter the events you show by choosing one category;
    3. Date Range:  from a drop-down list, you can filter your events based on a date range.  The default is All Upcoming Events and additional options include This Week, Next Two Weeks, This Month, or This Quarter

After adding the Events web part to your page and having published or saved it, you are now ready to add events.  To add an event:

  1. Click Add Event;
  2. At the top of the page, Name your event.  As an option, an image can be added to the title area.  Click the Add Image button located in the upper left;
  3. Add the dates and times in the When section;
  4. Enter the location and address in the Where section. If the address is recognized, you will have the option of including a map;
  5. If this is for an online meeting, you can enter the information in the Link section.  Place the link for the online meeting in the Address box, then add a Display Name.  If this is not for an online meeting, then leave the information blank. This section will not appear in the event; 
  6. If you want an event to show through filters, then choose a Category such as Holiday, Meeting, Business, Work Hours, and so on.  If you want to enter in a customized category, type it in the space rather than choosing one that is offered;
  7. In the About this Event area, provide a useful description; 
  8. If you would like to highlight people such as special guests, guest speaker or contacts, then you can add their names below the event description.  Note that only users within your organization can be added;
  9. Click Save when you are done. If you require to edit the event, click Edit at the top right of the event page. 

4.  Document Web Part

The Document web part allows you to insert a document file that can originate from Word, Excel, Visio or PowerPoint.  The starting page of the document is seen inside a frame by the user, but the user will be able to scroll down and/or download the document. 

To add a Document web part:

  1. Click Edit – found at the top right of the page;
  2. Hover your mouse below or above an existing web part, or under the title region. Click on the + sign in the green circle.  Select the Document web part;
  3. Insert the document you want by choosing a recent document, browsing for one, uploading one or via a link;
  4. Under the web part, you can add a description, but this is optional;
  5. Set the Start Page you want users to see first by clicking Edit Web Part.  Then, under Start Page, type in the page number you want it to start with.  Click Apply and this will now save and apply the new settings.
  6. Once your document is published, users will have options to either Download a Copy, Print to PDF, and Embed Code for sharing purposes. 

5.  Image Gallery

Share collections of images on a page in the Image Gallery. Images can either appear in tile form or in carousel form, which shows one photo at a time with a new photo replacing the previous on a timer. 

To add the Image Gallery web part:

  1. Click Edit – found at the top right of the page;
  2. Hover your mouse below or above an existing web part, or under the title region. Click on the + sign in the green circle.  Select the Image Gallery web part;
  3. Select the location where your images are stored;
  4. From the panel on the left, you have several options to choose the source of your images. The sources can be recent images, browse from a site, a link to insert the images you want, or you can upload from your device.  Choose one of these sources, then click Open to add the images you have selected;
  5. If you click the Edit button on each image, you will have the option of keying in a title, description, and alternative text;
  6. Add additional images by dragging and dropping, or by clicking +Add to select additional images;
  7. To specify the layout (tile or carousel), click Edit Web Part and choose the layout that you prefer. 

You are now able to determine what type of site to create (Team vs. Communication) based on your audience, create a new Office 365 Communication Site, discern between the five different types of web parts, modify your site with the addition of, deletion of and customization of the web parts on your site, and, finally, share your Office 365 Communication Site with those in your organization.  Through your Communication Site, you will be able to keep those in your organization informed of announcements, upcoming events, celebrations, information sessions, people information and so much more!

Editing and Publishing an Office 365 Communication Site – The Hero Web Part


In our previous installments, The Basics of the Office 365 Communication Site, The Components of the Office 365 Communication Site, and Creating an Office 365 Communication Site, we built upon the basics of a Communication Site to understanding how a Communication Site is created and shared. In this installment, we will now look at how to customize the Communication Site through adding, deleting and customizing the building blocks, referred to as web parts, of your page.

Web Parts – Customizing

As discussed in Part 2 of this series, there are three site designs that are made available when creating the Communication Site.  The three are Topic, Showcase, and Blank.  Each web part can be included, excluded and customized to your needs.   There are four web parts that are included, by default, in both the Topic and Showcase site designs.  With the Blank site design, you choose which web parts are to be included. 

Types of Web Parts

There are five different types of web parts, each with a specific function.  These web parts include:  Hero, News, Events, Document and Image Gallery. 

1.  Hero Web Part

The Hero web part in the Topic site design consists of a five-tile layout, but the number of tiles is customizable and can range from one to five.  In addition to this, links, images, and text for each tile can be changed.

The Hero web part in the Showcase site design defaults to a vertical layout with three layers but can range from one to five layers if customization is chosen.  

Changing the Hero Web Part Layout

To change the layout in the Hero web part for the Topic site design:

  1. Click Edit – found at the top right of the page;
  2. Click Edit Web Part – found at the top left of the page.  Select the layout you want.  As the Topic site design was chosen, you can choose the number of tiles to be displayed and the layout is visually presented under the number of tiles.

Changing the Hero Web Part Layout

To change the layout from a grid to vertical layers in the Hero web part for the Showcase site design:

  1. Click Edit – found at the top right of the page;
  2. Click Edit Web Part – found at the top left of the page.  Select the layout you want.  As the Showcase site design was chosen, you can choose the number of layers to be displayed and the layout is visually presented under the number of layers.
     

Changing the Image, Text, and Links for Each Tile or Layer

To change the image, text, and links for each tile for the Topic and Showcase site designs:

  1. Click Edit – found at the top right of the page;
  2. Click Edit Details – found at the bottom right of the tile or layer that you want to change;
  3. Click Change in the toolbox.  Choose a location from where to get your content:


    1. Recent:  listed here will be your recently opened documents, images, and pages;
    2. OneDrive:  obtain a link for a document or image that you have stored on OneDrive;
    3. Site:  obtain a link for a document, image, or page from a Site that you specify;
    4. Upload:  upload an image or document from a personal device;
    5. From a Link:  manually enter the link to a document, image, or your page from OneDrive for Business or SharePoint Online;
  4. Select your image, document, or page.  Click Open;
  5. In the Toolbox and under Image, select Custom Image or Color Only (this option is available only for the Tiles layout).  An image will automatically be selected from the page or document that you are linking to when Auto-Selected is activated;
  6. For the image, enter in Alternative Text;
  7. Click on Options, and if you decide to, you can show a Call to Action Link by switching the toggle to Yes.  Next, add your Call to Action Text.  The Call to Action link is available only for the largest tile in a tiled layout; and
  8. For the layered layout, there is an option to show a Topic heading.  Click on Options and switch the toggle for Topic Heading to Yes. Key in your Topic Heading Text


Reordering Tiles or Layers

Tiles and Layers can be reordered by moving them where you would them to go:

  1. Click Edit – found at the top right of the page; and
  2. Click and hold the Move Item button.  Drag the tile or layer where you want. 

Columnizing the Hero Web Part

The Hero web part is designed to span across the full width of the page.  If you choose to have the Hero web part span partially across the page, then you would add a column to the page and place the Hero web part into that column. 

  1. Click Edit – found at top right of the page;
  2. Above the Hero web part, hover your mouse until a line with a circle appears:

Plus sign for adding web parts to a page

  1. Click on the + sign in the green circle;
  2. Select One Column under the Section Layout; and
  3. Use the Move Web Part button, found on the left side of the web part, to drag the Hero web part into the column you had just added. 

Adding and Empty Hero Web Part to a Page

You can add an empty Hero web part, even if the page is not a Communication Site page.   

  1. Click Edit – found at top right of the page;
  2. Above the Hero web part, hover your mouse until a line with a circle appears:

Plus sign for adding web parts to a page

Click the + sign in the green circle.  Choose Hero web part;

  1. Click the Edit button for web parts.  Select the type of layout you want. Options include a grid from 1 to 5 tiles or 1 to 5 vertical layers;
  2. Click Select Link for each tile you want to change;
  3. Click Change in the toolbox.  Choose a location from where to get your content:


    1. Recent:  listed here will be your recently opened documents, images, and pages;
    2. OneDrive:  obtain a link for a document or image that you have stored on OneDrive;
    3. Site:  obtain a link for a document, image, or page from a Site that you specify;
    4. Upload:  upload an image or document from a personal device;
    5. From a Link:  manually enter the link to a document, image, or your page from OneDrive for Business or SharePoint Online;
  4. Select your page, image, or document.  Click Open;
  5. In the Toolbox and under Image, select Custom Image or Color Only (this option is available only for the Tiles layout).  An image will automatically be selected from the page or document that you are linking to when Auto-Selected is activated;
  6. For the image, enter in Alternative Text;
  7. Click on Options, and if you decide to, you can show a Call to Action Link by switching the toggle to Yes.  Next, add your Call to Action Text.  The Call to Action link is available only for the largest tile in a tiled layout whereas, in a layered layout, it is available for each layer; and
  8. Under Options, a Topic heading can be added for each layer by switching the Topic Heading to Yes for layered layouts.  Once switched to Yes, add your Topic Heading Text.

The Hero web part is the most configurable and contains the main content that you want to share with your audience. This is where features, announcements, status updates and news are shared.  Combining intriguing headlines and attention-grabbing images, the Hero web part seduces the audience to engage by reading, responding and participating. In our next installment, Part 5:  News, Events, Documents and Image Gallery, we will examine the last four web parts to complete the customization of your Office 365 Communications Site.

Creating and Sharing an Office 365 Communication Site

In our previous installments, The Basics of the Office 365 Communication Site and The Components of the Office 365 Communication Site, we discussed the fundamental reasons for creating a Communication Site and looked at the components of the Communication Site in greater detail. 

In this installment, we will advance to creating an Office 365 Communication Site.

6 Simple Steps to Creating an Office 365 Communication Site

The following are the six basic steps in creating a new Communication Site.  After creating your Communication Site, the Site can be customized with various web parts.  The six basic steps are:

  1. Sign in to Office 365;
  2. Select the App Launcher icon located in the top left corner of the page.  Next, select the SharePoint tile.  If you do not see the SharePoint tile, then click on the Sites tile.  If SharePoint is not visible, then click All;
  3. Once on the SharePoint homepage, click on the + Create Site.  Two Site creation options will be available:  Team Site and Communication Site.  Choose the option for Communication Site;

Pick a Modern Site Template

  1. Select one of the Site Designs (Topic, Showcase, or Blank – see Part 2 for details);

Communication Site Design

  1. In the next window, name your new Communication Site in the Site Name box.  In the Site Description box, provide information which conveys to your audience the purpose of your site; and  
  2. Click Finish.  Your Communication Site has now been created.  It will appear on other sites that you are following, but will not inherit permission settings or navigation of other sites.  Note that this Communication Site is not shared with others until you have used the Share command. 

Sharing a Site

Sharing a site is very simple!  By using the Share command, you an invite people in your organization to a site.  After creating a new site, it is a quick way to invite people and to grant permission to the people who you want to use your site. 

One way to build team spirit and collaboration is to take advantage of sharing the site with a Kick-Off! This is a great method to emphasize team collaboration and to announce to the organization the new project that will be taking place. 

To share a site:

  1. On the site that you want to share, click Share;
  2. A Share Dialogue Box will appear.  Type in the names of the invitees from your organization;
  3. Include a message with your invitation; and
  4. Click Share. 

The people from your organization that you have invited will now have access to your site once they accept your invitation.

As you can see, creating an Office 365 Communication Site is very simple, and consists of only 6 steps!  Sharing the Communication Site is also simple.  The next step will be to add, delete, and customize the web parts which delivers the content to your audience.  This is explained in detail in Part 4:  Adding, Deleting and Customizing Web Parts for an Office 365 Communication Site – The Hero Web Part  and Part 5:  Adding, Deleting and Customizing Web Parts for an Office 365 Communication Site – The News, Events, Document and Image Gallery Web Parts.

Office 365 Communication Site


The Basics of the Office 365 Communication Site

What is a SharePoint Communication Site? 

There are two types of sites that can be created to share information in SharePoint, but these sites target different audiences. As you are already familiar with, the Team Site audience comprises of the members of your team on a specific project.  All or most members of a Team Site can contribute content to the site and this information is limited to the members of the team, members of the project, and specific stakeholders.  The purpose behind Team Sites is for communication for collaboration between team members. 

On the other hand, a SharePoint Communication Site is just that – it is used to communicate to a broader audience including other project teams or the entire organization.  Unlike a Team Site where the majority, or all, of the members can contribute content, a small set of members contribute content to the Communication Site.  The Communication Site is the platform for sharing important information with others, especially those outside of your project team either on weekly or monthly basis; thus, content may include news, reports, statuses, product launches and other information that may be of interest to the broader audience. 

Communication Site content has been adapted to be mobile friendly while dynamically displaying and delivering content in visually compelling formats. Office 365’s Communication Site continues to offer mobile accessibility for SharePoint on the go and with the Cloud. 

Communication Site

Image showing News and Site Cards on Smart Phone and Tablet

Source: https://products.office.com/en-us/sharepoint/collaboration

Is it Easy to Create a Communication Site?

As with all Microsoft products, the development team has maintained its user-friendliness with Office 365 Communication Site creations.  There are three templates for creating new Communication Sites. The three initial site design templates are topic, showcase, and blank. 

Each template is completely configurable and contains pages within each template. These are also configurable. 

The Topic template is the best choice when there is a large amount of information to share. This information may include events, news, and other content.

The Showcase template is used for “showcasing” or featuring a team, product or event through the use of images or photos.

The Blank template can be configured and customized to your specific needs.

Communication Site Designs (left to right):  Topic, Showcase, Blank

Source: http://blogs.office.com

Once you have created your new Communication Site, you can then drag and drop to reorganize web parts on the page to highlight, showcase and announce the news to your broad audience. News and pages allow for multi-column layouts, providing the ability to creatively design and communicate your messages in a meaningful and intuitive fashion.

What Content Can Be Shared?

Feeling a little inundated with update emails?  Communication Sites can alleviate the email jam by allowing you to share your plans and updates in interactive and engaging ways.  By creating a page on a Communication Site, real-time data can be pulled across from Office 365 by embedding documents and videos.  This information can come from SharePoint documents, reports from Power BI, Microsoft Stream videos and discussions taking place on Yammer, all of which provide current, dynamic and rich internal communication.  All members can keep informed and for new members, it is a point from which they can gather information to quickly get up to speed. 

Where Can Office 365 Communication Sites be Connected From?

Not only can you access the Communication Site from your mobile app, but you can access, create content and engage with others from any device.  The full site, news, pages, navigation, search, and additional functionalities are natively viewable, engaging and functional.  From within the mobile SharePoint app, you can engage in a Yammer conversation, create a news article or read a page – all from within the context of the site. 

How Else Does Office 365 Communication Sites Enhance and Encourage Communication?

Communication Sites communicate effectively and efficiently through visually dynamic pages.  Your home page and sub-pages can be customized to meet your needs, but most importantly they can be made to look great!  Full-width layouts, spanning the page left to right, provides the page space to emphasize your most essential information.  With the enhanced title region and customized header image, along with full control over what portion of the image is the most important to highlight, visually presenting your home page, news and subpages with an attention-grabbing header graphic and title will not only look great on your desktop, but also on your mobile device. 

It is not just enough to communicate the recent news to your audience, but it necessary to engage in discussion, thereby, retaining your audience.  With the ability to comment on each news article and page, it allows your audience to provide feedback, which in turn can be used for the improvement of the page, article or project. 

A valuable feature is the ability to share the news via email. Unlike other shared information via email, news shared from a Communication Site will not only provide a blue link, but it will also provide a visual (thumbnail) and an informative preview (title, description) that adds context to the news article and email.  The ability to provide a message from the sender is also available. 

What is Displayed and Where Does the Data Come From?

As mentioned, the data displayed is dynamic and is pulled from either Microsoft Stream (videos or full channels) or Power BI (interactive reports).  Other sources of information and data can be pulled by adding web parts into your articles.  The first type is an Image web part which allows insertion of images and GIFs.  Sometimes there is too much content to be shown within the first view, truncating all other highlighted content. In these cases, selecting the “See All Pages” which proves to be handy.  When chosen, a full-page experience appears, providing a full view of all the content and activity.  The last web part is the “News” which is used to showcase your news by using multiple layouts to highlight what is important.  Layouts include Top story layout, which is the default, or List where you can view news in a list, or Side-By-Side. 

In this installment, we have determined:

1.  Why and when do you use a Team Site versus an Office 365 Communication Site;

2.  The simplicity of creating a new Office 365 Communication Site;

3.  What content is shared on a Communication Site;

4.  Where and what content can be shared from a Communication Site;

5.  Where can an Office 365 Communication Site be connected from;

6.  What devices can connect to a Communication Site;

7.  How is communication enhanced and encouraged by Office 365 Communication Sites; and

8.  What is displayed and where does the data come from.

From these, we now have an understanding of why we would create a Communication Site. With this understanding, we can now proceed to look at the Office 365 Communication Site in greater detail.