Building an FAQ Chatbot in SharePoint

What exactly is a Chatbot? Through the advancement of artificial intelligence (AI) software, chats, or conversations, in natural language can occur between a user and applications like messaging apps, virtual assistants, websites, telephone, and mobile apps. The most common and recognizable Chatbots are Cortana, Siri, and Alexa.

Chatbots are becoming widely implemented by corporations as they are one of the most advanced expressions of interaction between humans and machines. This provides enterprises the opportunities to practice wise resourcing and reduce costs of staffing support while providing excellent, streamlined, and dependable user support. Though chatbots are automated, human intervention is still crucial to their success. They still require configuration, training, and system optimization.

A chatbot is composed of two parts. The first is a user’s query that is analyzed. Once analyzed, the second part occurs which entails the response which is sent to the user. Though this sounds simplistic, it is not as beneath this “simple exchange” are complex mechanisms that invisibly take place without the user’s awareness.

The very first step is the ability of the AI software to determine the intent of the user, analyze the request, and extract data based on the intent. This is the most important function of your chatbot. If the intent of the user cannot be understood, then a response to the query cannot be given. However, if done correctly, the most appropriate response will be provided to the user. The response can be retrieved from several different sources including predefined generic text, text retrieved from a knowledge database, data stored in an enterprise, contextualized information based on data from user input, or from actions that the chatbot had previously performed through other interactions with one or more backend applications.

www.ExpertSystem.com

Microsoft has been using the combined powers of machine learning and AI in SharePoint and Office 365 and a FAQ Chatbot is a next step in this evolution. A FAQ Chatbot can be generated by utilizing LUIS, SharePoint Online, PowerApps, and Flow.

LUIS is the heart of your bot as it is the machine learning based service that is used to build natural language into bots, apps, and IoT devices. LUIS allows you to configure questions that your users might answer to determine their intent. The type and configuration of utterances (the input from the user that the app needs to interpret) should be considered when configuring LUIS. Utterance length, such as short, medium, and long, can play an important role. The phrase length can be long, such as full sentences, or short, such as keyword searches. The word can be truncated from full text to acronyms or abbreviations. Other variances to consider are spelling, grammar, stemming, pluralization, noun and verb choice, punctuation, and word placement.  A solution and a consideration for misspelled words is the provisioning of a spell checker, like Bing Spell Check, that will allow the user to correct the word spelling before hitting the submit button. The more utterances you configure with LUIS, the higher the probability that LUIS will be able to identify the user’s intent. One key thing to remember is that users may not have the domain experience of the question that they are querying, and it is important to create phrases and use terminology that the majority of users will use.

While LUIS determines a user’s intent, or what they are asking, SharePoint Online, rather SharePoint Lists, is used to store the responses from the Chatbot by using the intent keywords returned by LUIS. By employing SharePoint Lists, users without an Azure account will be able to maintain the responses of the bot while allowing the creation of rich text formatted responses. SharePoint List will return the response content of the intents of the users and users will be able to maintain responses within SharePoint without having to go to any other tool to do so.

To begin creating the FAQ Chatbot, you will need to create an app in LUIS to store your intents. Next, you will need to create a list in SharePoint Online to store the response content for the intents.

The most efficient way of building the bot is to create it in Flow as Flow will do most of the work. Once the bot is created in Flow, the next step would be to connect Flow with PowerApps to make it run.

Create the Flow

  1. Create a New Flow. Choose Blank;
  2. Choose PowerApps as the trigger. Next, Add New Step;
  3. Add an Action, such as Send it to LUIS. Note that there are already LUIS actions available to choose;
  4. Open the LUIS application. At the top, click on the “Manage” tab. You will be taken to the Application Information page where the LUIS application ID can be found. Copy and paste the LUIS application ID into the Flow content box that requires this ID;
  5. Complete Utterance Text, which is the question being asked that needs to be passed to LUIS to get the intent. This comes from PowerApps. On the text box, choose Dynamic Content and a section for PowerApps will come up. Next, click on the tab “See More”. This will now provide a selection to Ask in PowerApps. By clicking this, the question will now come from PowerApps; and
  6. Specify the desired intent to be saved. There are several value choices plus an option to customize the value. Choose “None”.

Once this step is completed, the functionality is written to get an intent from a user when they ask a question in PowerApps.

The next step of the process is to take the intent and query the SharePoint List by that intent to get the correct or most probable response. Intents will be listed in LUIS. Your SharePoint List, titled FAQ List, will have the title field that is the same as the intent that exists in LUIS. In other words, the Title Field of the FAQ in the SharePoint FAQ List is the intents listed in LUIS. The response that you want to send to the user is in a field called “FAQ” in the FAQ List.

We now need to query SharePoint from Flow. Start by searching “SharePoint Get Items” which will populate a drop-down list with the site that houses your list (FAQ). Choose the site that has your list. Then, choose the type of filter query. In this instance, you can set the query so that the title field equals the intent. An example can have the Filter Title equal to the Top Scoring Intent Name, and this comes from LUIS. There should always be only one entry for the Top Scoring Intent Name, so chose the top One Count.

A variable will now need to be created to store this response in to pass that variable back to PowerApps. To do this, create a New Action to initialize a variable called “Response”. Add a new step to set the variable. This is a separate step, and not created during initialization because it is based on a collection from the Get Items Query.

Set the Variable response to the value of the response of the query of the FAQ. This is the field that holds the response. Flow will automatically fill it and applying it to each variable as it does not know the number of items being returned.

The response is now stored in a variable called Response and it will now be passed back to PowerApps.

The final step in this process requires a Search for PowerApps. Choose to Respond to PowerApps with one of several options, including Respond with Text or Respond with the Name of the Variable (Response). Save the Chatbot query settings.

Create Display Form for the Flow

Up until now, these processes occur in the background, invisible to the user. Which leads us, now, to build the form in PowerApps:

  1. Create a New App. Choose a blank app as well as the phone layout so that it is mobile friendly;
  2. Insert Text Box which will be used by the user to enter their query. Set the parameters;
  3. Add a Submit button so that the user can send and activate the process; and
  4. Add HTML Text to Screen to display the response in text and not HTML.

These four pieces are required to display the response from Flow.

Connecting Flow and PowerApps

In the apps screen above, highlight the Submit button. Go to the Actions tab in the menu bar and select Flows. Choose the Flow that you just created. Once you choose this Flow, it will automatically be added to the function/formula line. It automatically adds it as it knows that information will be needed from PowerApps because it was told that information would be passing in the query that was entered. Note that the function/formula is incomplete, and to make it run, it must be completed. The value or question that the user enters in the text box will be passed in the run function. Enter textinput1.text. By doing so, it will now call the Flow, passing the question. The response that comes back from the Flow is in the form of a collection so we cannot set the response to a variable and display that variable.

Therefore, when the Flow is completed, a function called Clear Collect needs to be called. This function clears the variable in the collection and sets that collection variable to the results. Because the results of the Flow is a collection, the responses from that Flow can be stored in a variable called Responses in a collection.

What is happening is that we call the Flow, pass the question, receive the response, and that response is stored in a variable collection.

As we are storing this response in a collection, we need to be able to display that data as it is no longer a variable. This is done by inserting a data table. The data source for this table is the Response variable.

Open the function/formula line. Select the Response variable. This will populate into the formula line and in that formula, set the data to be the Response variable. The data table is set up as the data in a collection. Next, click on the link under the data slide out box. The data field Response will appear. Choose Response to add to the app. This will now tell it what data from that collection you want to display in the data table.

The final step of this whole process is to ensure that the data does not display as HTML by choosing to that response to be Display HTML Text Field. The response cannot be displayed from the data table because the response is not formulated with HTML and without the Display into an HTML Text Field, it will appear as gibberish to the user. The source of the HTML text box must be specified as the data table along with the response from that selected row in the formula. Finally, select “Hide Data Table” so it is not visible to the user.

Save your FAQ Chatbot. Then, test your FAQ Chatbot by running PowerApps and Flow with a query.

This is your FAQ Chatbot and it runs like this. Your user enters a question in the text box. Once completed, your user will hit the Submit button. The Submit button then calls a Flow, which then passes the value of the text box, returning a response into a collection variable called Response. This collection is then set as the data table and Flow will take the selected entry from the data table and display it in the HTML textbox. The user will now have a response to the query in a natural language.

An FAQ Chatbot is an essential part of any enterprise. It provides efficient, fast, and dependable user and client support. It allows your clients and users to perform independently, freeing up valuable resources, lowering staffing costs, and providing immediate answers. As you can see, a FAQ Chatbot can easily be generated with LUIS, SharePoint Online, SharePoint Lists, Flow, and PowerApps.

SharePoint Fest DC 2019

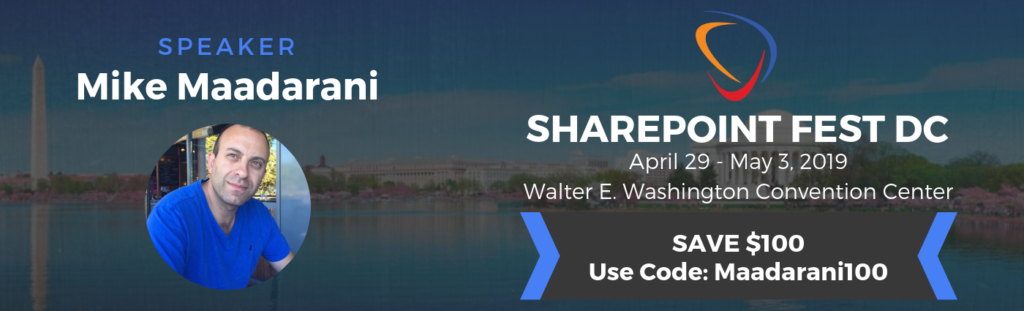
Chicago Fest Chicago is April 29th to May 3rd, 2019, a full week packed with workshops, breakout sessions, Ask the Experts panel, and podcasts. This is one of my favorite conferences, and I am honored this year to present one workshop and 3 sessions:

  1. Workshop – 4/29/2019: OneDrive Deployment from Start to finish. This video gives you a quick overview of the workshop.
  2. Session 1 – 5/1/2019: The Evolution of SharePoint ECM to Content Services
  3. Session 2 – 5/2/2019: Increase your collaboration with Azure Automation
  4. Session 3 – 5/3/2019: Build an intranet with modern SharePoint

There is a great lineup of speakers, so make sure you check out the agenda and register for this awesome conference.

You can use Maadarani100 code and get a $100 discount.

SP Fest DC

Migrate SharePoint Classic to Modern

SharePoint Online is a dynamic collaborative platform that continues to provide visually pleasing, improved and more streamlined processes and accessibility for the end user. The availability of Modern sites is increasing. A Modern site consists of modern Office 365 group-connected team or communication sites. By combining these with improved functionality, content is presented in a modern user interface that is not only aesthetically pleasing, but provides content in a format that communicates clearly, navigates easily, and puts some controls back into the hands of the end-user.

But what if your organization has classic team sites and lots of them? How do you migrate these to the modern SharePoint Modern site? You can fully transform your classic team site into a modern Office 365 group-connected site with in-place modernization. Modernizing the sites will involve one or more of the following steps:

  1. Maximize and Leverage Modern List and Library: The modern user interface is the most visible aspect of a modern site. In the classic sites, particular pages will appear in the modern user interface, on the condition that modern experience has not been turned off. The pages will appear in the modern user interface include List and Library pages for most lists and libraries, site usage page, site contents page, and recycle bi pages. However, Home page and all other site pages such as wiki pages and/or web part pages, and List and Library pages for certain libraries and lists, will continue to the classic user interface.

    Starting April 1, 2019, it will no longer be possible to restrict an entire organization (tenant) to classic mode for lists and libraries. Refer to Chris McNulty’s Post.

    To transition to a modern user interface from the classic user interface, there are two areas that require attention. The first is transitioning of lists and libraries to the modern list and library experience, basically, the modern user interface. The second is to transform classic wiki and web part pages, your classic pages, to modern client-side pages.

    Planning is the foundation for a successful migration from classic to the modern user interface. Involving key players is an important step towards a successful migration.

    Identify and educate your stakeholders and they will include:

    a. Key business stakeholders – this group will be playing a crucial role in assisting end-users in adopting the modern user interface. Prepare them by working closely with them. Provide direct involvement through access to the play environment so they can become familiar with the upcoming changes. Listen to their needs, their feedback, and their recommendations. Ensure that their business needs are met;

    b. Customization team and developers – this team will need to be available to redesign customization that were built in the past for the classic user interface. Not all customization will be transferable to the modern user interface;

    c. SharePoint administrators – the admins are the ones who will enable the modern user interface to your tenant and sites; and

    d. Change management and governance teams – switching from the classic to the modern user interface will have an impact on users, and an update of internal training materials will be needed. Change management will be important for users who are affected by the switch.

    Analyze your site collections once your stakeholders are involved, educated, and supportive.

    How will you know which site collections are ready to be modernized? How is it determined which site collections are good candidates for this modernization? Luckily, Microsoft has built a scanner to help with transforming site pages, lists, and libraries or connecting sites to an Office 365 group. The SharePoint Modernization scanner will provide a detailed analysis of the readiness of the sites for connecting to an Office 365 group. This analysis will provide a deeper understanding of the compatibility between the modern user interface, lists, and libraries. It will also perform a detailed analysis of the web part pages and wiki pages so you can prepare for page modernization. Armed with the results of the scan, remediation work can begin to prepare the collection sites for modernization.

    a. Incompatible Customization – replace with equivalent ones that work in a modern user interface;

    b. Modernize User Experience – this is done by:

    i. Enabling lists and libraries to show in the modern user interface by replacing customization, remove incompatible columns from the used views, or move data into a modern user interface compatible list type (this should be the last resort);

    ii. Connecting the site to an Office 365 group. By doing so, this will provide your site a modern home page which, in turn, enables the end user to use modern app versions;

    iii. Creating modern client-side pages and configuring them to be “similar” to the key classic wiki and web part pages. For key pages of your site, programmatic page transformations should be done. However, not all pages will require this as it is resource intensive. The usage information can be obtained from the SharePoint Modernization scanner for the web page parts and wiki page; and

    c. Communicate with the End-Users – inform, educate, and prepare your end-users for the modern user interface as the sites will work differently than in the classic modern user interface.
  2. Connect Your Site to an Office 365 Group: Classic team sites are not connected to an Office 365 group. To modernize these sites, they will need to be connected to an Office 356 group. Once connected, the site will be able to access other Office 365 services such as Teams, Outlook, and Planner. Modern team sites are already connected to Office 365 groups.

    How do you connect the classic team site to an Office 365 group? There are two methods to do this. The first is to launch a wizard from the user interface. The wizard will walk the site owner through the process. The second method is to do a bulk operation or a group-connection. With a group-connection, a series of sites can be connected, at one time, to an Office 365 group. With this method, control over configuration, including site classification, alias name, the privacy of the site as public or private, are maintained. For this reason, it is the preferred method for large organizations.
  3. Switch to Modern Tenant-Scoped Branding: Connecting to an Office 365 group results in a modern site home page and it will also allow the use of a modern site theme. The new modern site home page accepts corporate branding on SharePoint team sites. With classic sites, branding was created by using site themes, master pages, and alternate CSS. The latter two are not compatible with the modern user interface, and evaluation of these branding customization will be required to determine their relevancy. Classic site themes can be transformed into the modern user interface. Even so, it is highly recommended to switch to tenant-controlled site themes which will be respected in future modern team sites.
  4. Transform Classic Site Pages into Modern Pages: This is the final step. Even though you have completed the previous steps, your site pages will still appear in the classic user interface. Transforming pages is not an easy or simple process. There is no one-on-one mapping between the functionality of classic web parts and what is offered by client-side web parts on modern pages. As such, it is recommended that only frequently used pages be transformed into modern client-side pages.

Migrating SharePoint Classic to Modern experience entails several steps and engages several audiences. Successful transition and migration of the classic user interface to the modern user interface require planning, remediation, analysis, and prioritizing sites and pages that are to be transformed into the modern user interface. Without a doubt, there are many positives to switching from the classic user interface to the modern user interface.