Hybrid BCS Part 3 – External Content Type Configuration
 Wednesday, July 29, 2015
- By : Mike Maadarani
 0 comment
Next, you will need to create an External Content Type (ECT) based on the OData source. We need to reiterate here that Hybrid BCS implementation only work with OData source based ECT. The ECT can only be created with Visual Studio and not with SharePoint Designer.
To create an ECT, you need the following requirements:
- SharePoint Server 2013
- Visual Studio 2013
- Office Developer Tool for Visual Studio 2013
- OData service that can be accessed from the internet
Create new SharePoint App
Using Visual Studio 2013, create a new SharePoint App:
-
Under the Office/SharePoint templates, select App for SharePoint to create a new project
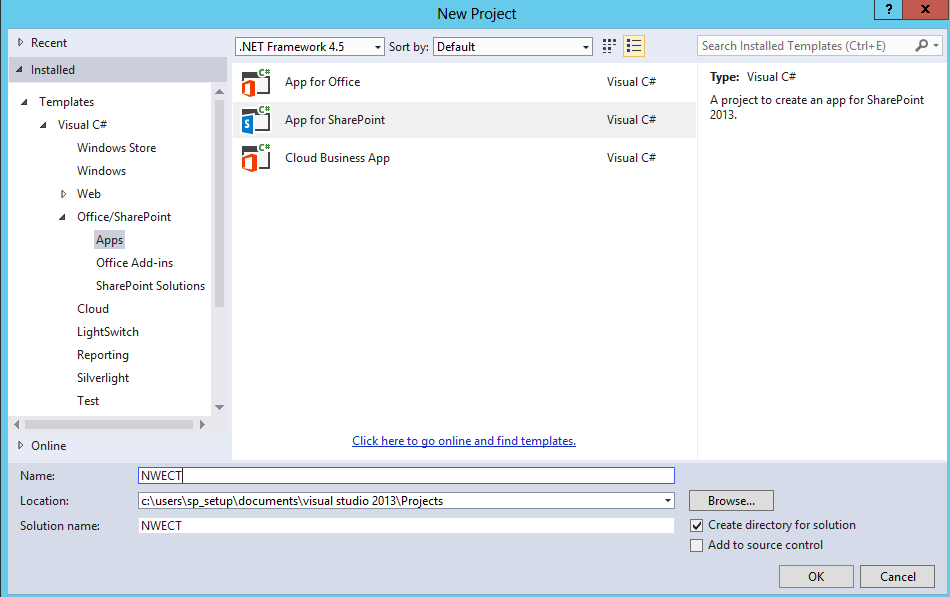
- Name your project and click OK
- Select your local on-premises SharePoint URL to debug your project
-
Select SharePoint-hosted
Note: SharePoint-hosted apps, or apps where all components are hosted on either an on-premises or Office 365 SharePoint farm. SharePoint-hosted apps are installed on a SharePoint 2013 website, called the host web. - Click Finish
- In the Solution Explorer, click on Add à Content Types for an External Data Source
- Enter the URL of your OData service you have published in the previous Section and choose a Name for it
- Click Next
- Select the one or more data entity
- Click Finish
This process will create the External Content Type for each of the entity you have selected.
Once you have created your External Content Type, you want to add the ECT to your Business Data Catalog (BDC) catalog so you can use it in your site collections.
In the previous section, we explain how you create an ECT, where each entity in the OData source represents a single ECT. However, the entities use a shared name in the ECT file, which will prevent you from uploading more than one entity to the BDC catalog. In order to fix this issue, you need to follow these steps to be able to use the entities in SharePoint:
- From Visual Studio, right click on the ECT file, and select Open with. Each entity will have its own .ect file located under “External Content Types\<folder name>”.
- Select XML (Text) Editor and click OK
- In the top of the document, within the Model element, you will see a Name attribute. This Name attribute is the name you have selected when you connected to the OData source. For example it can look like NorthwindCustomersModel. The value of this Name is the same in all of the ECT files created from the entities, but it has to be unique in order to use it in SharePoint. You will need to change the name based on the ECT you are using. For example, it will be something like Categories Table or Employees Table, etc…
- Change the name in each of the ECT file
- Change the name of the Namespace in the Entity element (optional)
- Save the ECT file
Upload ECT to the BDC Model
Once you have made the changes to all of your ECT files, you can upload all your entities to your BDC model. To do so:
- Go to your SharePoint Central Administration
- Navigate to Application Management à Manage service applications
- Click on your BDC Model
- Click on Import
- Navigate to your ECT file locations and import each ECT file; as an alternative solution, you can develop a PowerShell script to import all the files
- Click OK
- Repeat the above steps for all your models
- Once you have imported the BDC models, you will need to grant permissions for users to use them
- On each of the model, click on the dropdown menu and select Set Permissions
- Select the right permission you need to give for each group