SharePoint and Office 365 PowerApps Enhanced
Why use PowerApps?
PowerApps is used to build customized SharePoint forms without the need for writing code or formula, simplifying and transforming the cloud and mobile business process. Though geared towards power users, any user can use PowerApps to customize default forms to view and edit SharePoint data. Over 160 data services are accessible, including Office 365, Dynamics, Box, Salesforce, Twilio and Mail Chimp. Embedded into SharePoint, these forms provide a native and seamless experience for users. At Ignite 2017, Microsoft announced many new and upgraded features to PowerApps that not only will ease the creation of apps but will benefit the end user in the ease of usability.
In addition to viewing and editing SharePoint data, the ability to upload attachments into a list is incorporated into PowerApps. Not only will this ease the workflow, but the ability to multi-select items from a list within your customized PowerApps forms provides additional user-friendliness which translates into saved time for the user.
The Ease of Authoring Apps
Without having to write code for rules and conditions, PowerApps makes it easy for users to start building apps without a single formula. Add PowerApps Studio, and your work in progress will now be automatically saved. Three key features of PowerApps include:
Rule Builder: the rule builder allows the user to express conditional logic for actions and formatting by simple point and click. The rule builder lessens the amount of time required to create sophisticated apps without the need to create advanced formulas.
Auto Save Apps: apps are automatically saved in the background, allowing the creator to focus on building apps without the fear of losing any work that is in progress.
Guided Configuration: setting up forms, galleries, data tables and other complex controls in context is simplified with the wizard-like guided configuration tool.
Visibility and Trust for Enterprises
Greater central administration and control for IT teams is available through PowerApps. Some features include compliance certification, analytics, and a centralized admin centre:
Compliance Certification: available in the Microsoft Trust Center is the Business Application Platform which includes PowerApps, Microsoft Flow, and Power BI. Compliance certification includes EU Model Clauses, HIPAA/HITEC, ISO 9001, 27001 and 27018, PCI, SOC 1, 2 and 3.
PowerApps Admin Center: provides control to tenant admins the ability to view a list of all apps created in their organization and list all users who are using PowerApps. Additionally, admins will also be able to:
Update app permissions – add or change users with whom the app is shared with
Delete an existing app – delete an existing app that is not used by any user
View data sources of app – view the data sources used by an app
Update owner of app – update the owner of the app
PowerApps Usage Analytics: by embedding Power BI reports, app creators and admins can understand application usage from detailed analytics through PowerApps.
Embedding Capabilities
PowerApps will provide app creators the ability to create apps that will have direct interaction with different solutions and websites through its embedding capabilities. End-users will benefit by having the ability to use the apps in the context of the solution they are using.
Embed PowerApps as Web Parts in SharePoint: the PowerApps web part enables PowerApps to be embedded in any SharePoint page, including list forms. With this, users can customize their business processes by using a custom-built app and can take action right from SharePoint.
Embed PowerApps in Power BI Reports: apps built with PowerApps will be embeddable into Power BI reports, providing business analysts the ability to set filters and data parameters to produce the required data in reports within the app. Users can then take actions based on the insights they see in Power BI.
Server-Side Business Logic: rich data bound apps built by PowerApps will be supported in the Common Data Service for relationships and server-side logic in Q1 2018.
Managing the App – PowerApps Admin Centre
1. Click Environments near the left edge of the PowerApps Admin Centre. Select the environment that you want to view the list of apps;
2. On the horizontal navigation bar, select Resources, then Apps. From the Apps list, select the app that you want to manage or view;
3. View or Manage the app with the following operations: delete the app, view connection, flows and other details associated with the app, and view and modify users with whom the app is shared with.
PowerApps Analytics – The App Performance Report
The PowerApps Analytics report is accessible by app authors and provides analytical performance data that has been tracked on a specific app for the past 30 days.
Accessing the App Performance Report
To access the PowerApps analytic apps performance report, follow the following steps:
1. Go to web.powerapps.com;
2. On left navigation bar, select Apps;
3. Select Analytics (preview) for the app; and
4. From the drop-down, select Performance.
To download the report, select Export Data by clicking the ellipses in the top right corner of the chart. The report will be exported in a .cvs file.
PowerApps Analytics – The Dashboard
The following information can be found on the dashboard:
1. Time to first screen – this is the time it takes from clicking the app icon to PowerApps handing control to the app’s first screen. This is for the 50th, 75th, and 95th percentiles. Note that this excludes the time to load the app’s first screen.
2. Time to first screen without connection set up – this is the time it takes from clicking the app icon to PowerApps handing control to the app’s first screen. This excludes the time the user spends on the connection setup. Information is for the 50th, 75th, and 95th percentiles. Note that this excludes the time to load the app’s first screen.
3. Session length – this is the time the users spend on the app after a successful launch of the app. This includes the 50th, 75th, and 95th percentile times.
4. Number of users per session length – provides the user distribution, after a successful launch, over session lengths of < 1 minutes, 1 – 5 minutes, and > 5 minutes.
At Ignite 2017, Microsoft announced many new and upgraded features to PowerApps that not only will ease the creation of apps but will benefit the end user in the ease of usability. These were only a few of the latest enhancements to PowerApps as there will be more features coming with future releases.
 Thursday, October 19, 2017
 0 comment
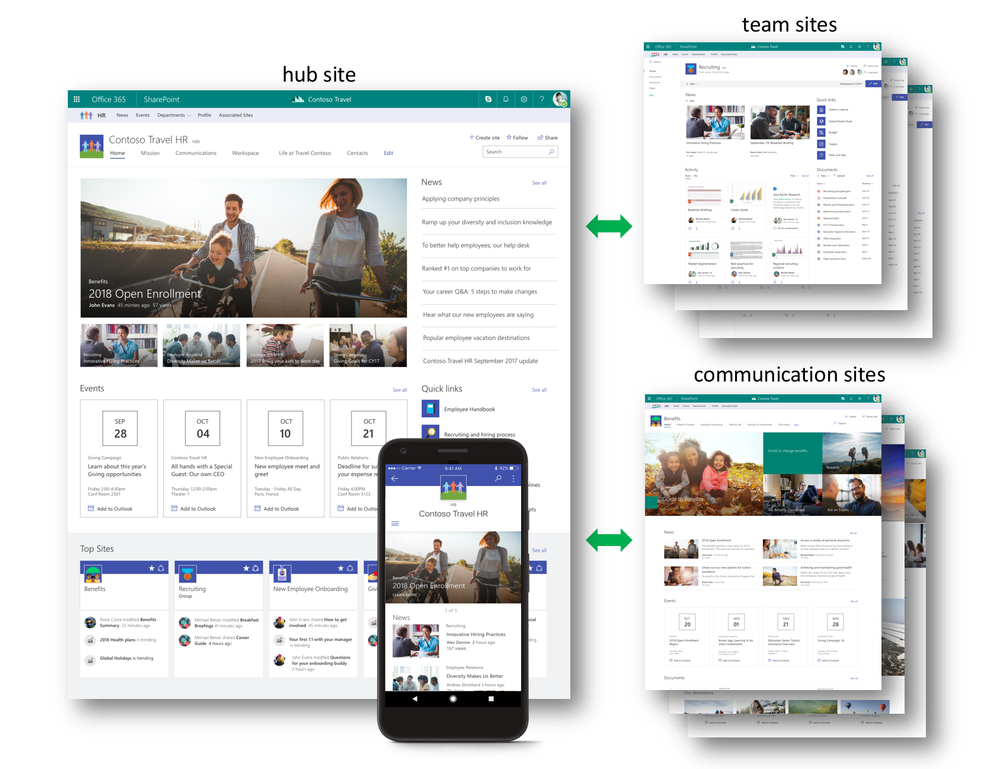
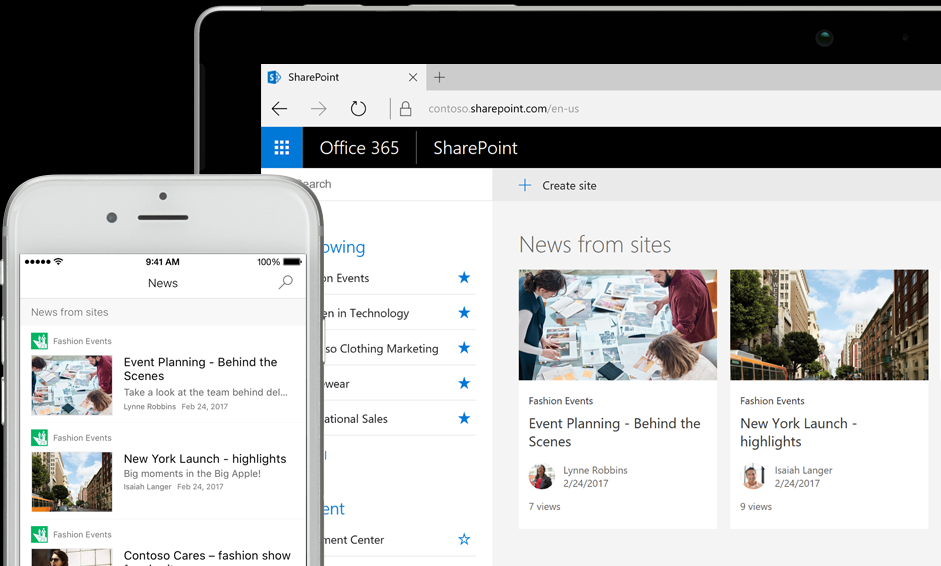
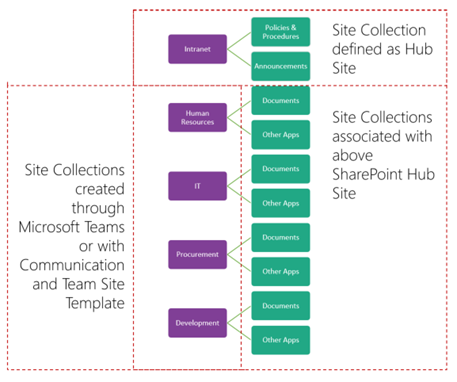 SharePoint is a tool for collaboration and the sharing of information. Within an organization, there can be numerous project teams working on a variety of projects and it is important to increase awareness, visibility, and discoverability to encompass those who are not part of the core team. It would be unreasonable to expect your audience to search and drill down for the information, but having access to clear, concise communication that expresses in a broad sense of what is happening with the projects and initiatives would be valuable. Team sites and communication sites push information and content up to the hub site level with rollup web parts. These parts can surface content from all your associated sites into one place, allowing the flexibility for you to shift your content and associate it where it makes the most sense, unlike rigid hierarchy.


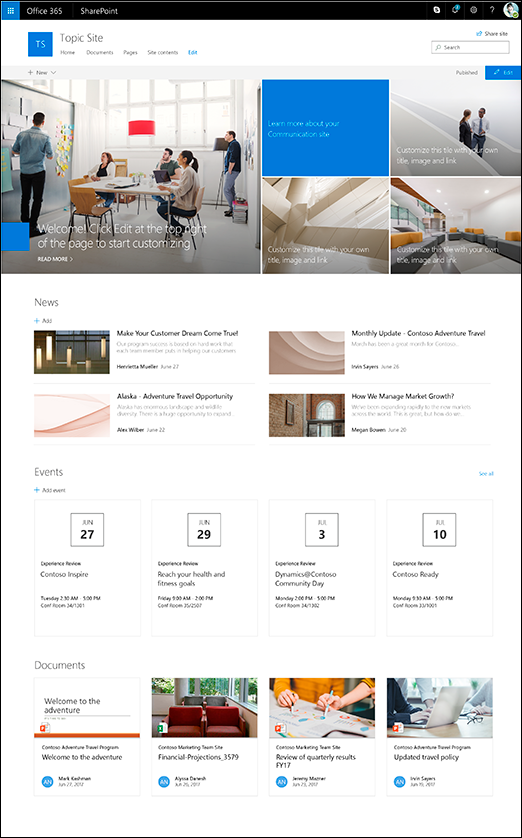 The default layout is five tiles: one large tile on the left and four smaller tiles forming a square on the right. The number of tiles can be changed and can range from one tile to five tiles.
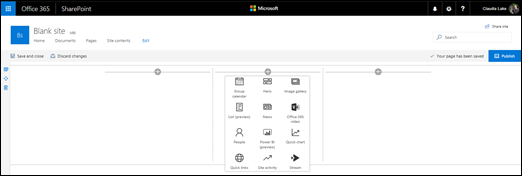
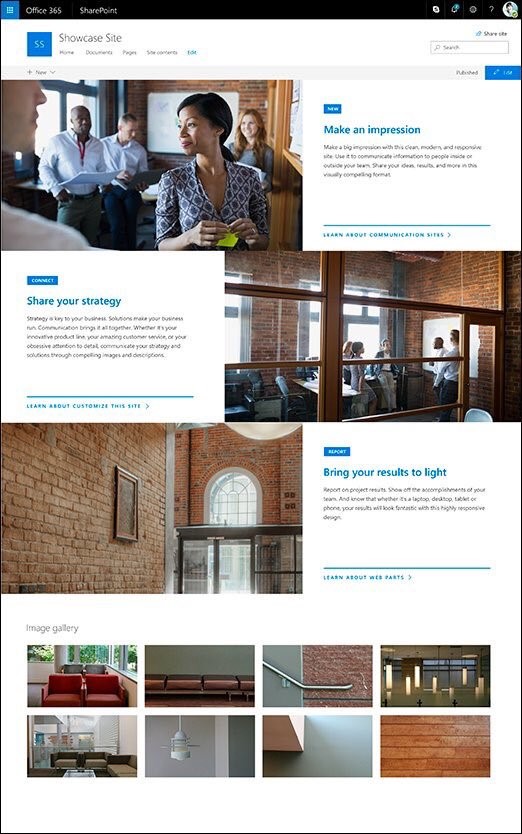 The Showcase design is to bring focus and attention to your featured highlights through the use of attention-grabbing graphics. The default web parts included in the Showcase design in conjunction with the Communication Site are Hero and Image Gallery.